【アプリ開発】iOS 8とiOS 7でUIAlertController・UIAlertView・UIActionSheetを切り替えて使う方法
公開日:
:
最終更新日:2015/12/01
iOSアプリ開発
記事内に広告を含む場合があります。記事内で紹介する商品を購入することで、当サイトに売り上げの一部が還元されることがあります。

@akio0911です。今までお世話になったUIAlertViewとUIActionSheetがiOS 8からはdeprecatedになり、新たにUIAlertControllerというクラスが導入されるということで、iOS 7の時はUIAlertViewとUIActionSheet、iOS 8の時はUIAlertControllerを使うコードを書いてみました。
UIAlertControllerが使えるか確認する
まずはUIAlertControllerが使えるか使えないかで、iOS 7かiOS8 かを判定します。
    Class class = NSClassFromString(@"UIAlertController");
    if(class){
        // iOS 8の時の処理
    }else{
        // iOS 7の時の処理
    }
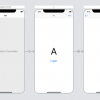
アラートを表示する
アラートを表示するコードは以下のようになります。
- (void)showAlert:(NSString*)text
{
    Class class = NSClassFromString(@"UIAlertController");
    if(class){
        // UIAlertControllerを使ってアラートを表示
        UIAlertController *alert = nil;
        alert = [UIAlertController alertControllerWithTitle:@"Title"
                                                    message:text
                                             preferredStyle:UIAlertControllerStyleAlert];
        [alert addAction:[UIAlertAction actionWithTitle:@"OK"
                                                  style:UIAlertActionStyleDefault
                                                handler:nil]];
        [self presentViewController:alert animated:YES completion:nil];
    }else{
        // UIAlertViewを使ってアラートを表示
        UIAlertView *alert = [[UIAlertView alloc] initWithTitle:@"Title"
                                                        message:text
                                                       delegate:nil
                                              cancelButtonTitle:nil
                                              otherButtonTitles:@"OK", nil];
        [alert show];
    }
}
UIAlertControllerクラスのalertControllerWithTitle:message:preferredStyle:メソッドではUIAlertControllerStyleAlertを指定するのがポイントです。
アクションシートのボタンが押された時の処理
UIAlertControllerはブロック、UIActionSheetはデリゲートで処理を指定するので、ボタンが押された時の処理をメソッドにして共通化しておきます。
// action1ボタンが押された時の処理
- (void)action1
{
    [self showAlert:@"action 1"];
}

// action2ボタンが押された時の処理
- (void)action2
{
    [self showAlert:@"action 2"];
}

// action3ボタンが押された時の処理
- (void)action3
{
    [self showAlert:@"action 3"];
}
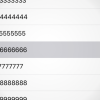
アクションシートを表示する
アクションシートを表示するコードは以下のようになります。
- (IBAction)pressActionButton:(id)sender {
    Class class = NSClassFromString(@"UIAlertController");
    if(class){
        // UIAlertControllerを使ってアクションシートを表示
        UIAlertController *actionSheet = nil;
        actionSheet = [UIAlertController alertControllerWithTitle:@"Title"
                                                          message:@"Message"
                                                   preferredStyle:UIAlertControllerStyleActionSheet];
        [actionSheet addAction:[UIAlertAction actionWithTitle:@"Action 1"
                                                        style:UIAlertActionStyleDestructive
                                                      handler:^(UIAlertAction *action){
                                                          [self action1];
                                                      }]];
        [actionSheet addAction:[UIAlertAction actionWithTitle:@"Action 2"
                                                        style:UIAlertActionStyleDefault
                                                      handler:^(UIAlertAction *action){
                                                          [self action2];
                                                      }]];
        [actionSheet addAction:[UIAlertAction actionWithTitle:@"Action 3"
                                                        style:UIAlertActionStyleCancel
                                                      handler:^(UIAlertAction *action){
                                                          [self action3];
                                                      }]];

        // ユニバーサルアプリかiPadアプリの場合は、
        // UIPopoverPresentationControllerを使った以下のコードが無いと落ちてしまうので注意
        // (このコードがあっても、iPhoneでの実行時には何も変化なし)
        actionSheet.modalPresentationStyle = UIModalPresentationPopover;
        UIPopoverPresentationController *pop = actionSheet.popoverPresentationController;
        pop.sourceView = self.actionButton;
        pop.sourceRect = self.actionButton.bounds;

        [self presentViewController:actionSheet
                           animated:YES
                         completion:nil];
    }else{
        // UIActionSheetを使ってアクションシートを表示
        UIActionSheet *as = [[UIActionSheet alloc] init];
        as.delegate = self;
        as.title = @"Title";
        [as addButtonWithTitle:@"Action 1"];
        [as addButtonWithTitle:@"Action 2"];
        [as addButtonWithTitle:@"Action 3"];
        as.destructiveButtonIndex = 0;
        as.cancelButtonIndex = 2;
        [as showInView:self.view];
    }
}
UIAlertControllerクラスのalertControllerWithTitle:message:preferredStyle:メソッドではUIAlertControllerStyleActionSheetを指定するのがポイントです。
また、UIActionSheetでボタンがタップされた時の処理を記述するためにactionSheet:clickedButtonAtIndex:メソッドを追加します。
// iOS 7でアクションシートのボタンが押された時の処理
-(void)actionSheet:(UIActionSheet *)actionSheet clickedButtonAtIndex:(NSInteger)buttonIndex
{
    switch (buttonIndex) {
        case 0:
            [self action1];
            break;
        case 1:
            [self action2];
            break;
        case 2:
            [self action3];
            break;
        default:
            break;
    }
}
@akio0911はこう思った。

ボタンが押された時の処理を指定する方法が、デリゲートからブロックへと変わっているので対応がちょっと面倒くさいですが、iOS 8が正式リリースされるまでにキッチリと対応しておくのが良いと思います。
アプリ開発講座も開催しています。気になる方はこちらのページをチェックしてみてくださいね! ⇒ 未経験者向けのiPhoneアプリ開発講座「アプリクリエイター道場 東京塾・大阪塾」
 未経験者向けのiPhoneアプリ開発講座「アプリクリエイター道場 東京塾・大阪塾」


関連記事
この記事が気に入ったら「いいね!」しよう
Twitterで更新情報をゲット!